The intent of the course is to teach the student to reflexively
employ their handgun and to put fight stopping hits on the opponent regardless
of the tactical environment, position, or injury the shooter finds themselves
with. Movement and verbal commands will be stressed throughout the course.
Also if facilities allow live fire building clearing will be conducted.
Subjects covered:
Firearms safety as it pertains to self defense. The basics of firing,
stance, grip, sight alignment, trigger press, speed reloading, tactical
reloading, stoppage drills, rapid multiple shots on single targets, rapid
engagement of multiple targets, engagement of targets from the ready position,
the draw and the concealed draw, and the proper tactical response to single
or multiple opponent situations.
Contact distance employment of the handgun, moving to the rear and laterally
while drawing and shooting, rapid assumption of various shooting positions
such as kneeling and prone which will allow the shooter to gain more accuracy
and protect themselves from being injured, tactical management of danger
areas such as corners, doors, and stairwells as needed when protecting
the home. Shooting around cover, braced cover positions, one handed shooting,
"downed officer" drills, challenging / covering of opponents, Pivots (turning
left, right, and 180 degrees while drawing).
The student will learn to use their handgun in low light situation,
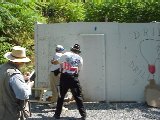
covering such skills as combined and separate use flashlight techniques,
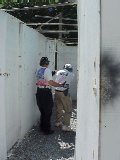
weapons manipulation with a flashlight. The student will be shown how to
use cover and concealment with a flashlights and how to conduct tactical
clearing with the flashlight.
Lectures include:
Legalities concerning the use of deadly force, interactions with law
enforcement, handgun types and modifications, ballistics and ammunition
selection as it pertains to the handgun, holster selection and accessories,
flashlight types and modifications, night sights, and accessories.
The following photos touch on some of the highlights of the course.
Click on the pics for the full sized image.
 1.
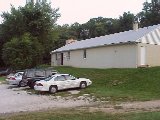
The course was held at the facilities of the West Shore Sportsmen's Association
in Harrisburg, PA. The WSSA has nine different outdoor pistol and/or
rifle ranges, including steel plate, cowboy action, and tactical training
house ranges. They also have outdoor trap and archery ranges, plus
an indoor range. One of the better facilities I've visited. 1.
The course was held at the facilities of the West Shore Sportsmen's Association
in Harrisburg, PA. The WSSA has nine different outdoor pistol and/or
rifle ranges, including steel plate, cowboy action, and tactical training
house ranges. They also have outdoor trap and archery ranges, plus
an indoor range. One of the better facilities I've visited. |
 2.
The class met daily from 8:00am to 6:00pm. Lectures were given in
the club house, with most shooting done on the adjacent pistol range.
We also made use of the indoor range and the tactical training house. 2.
The class met daily from 8:00am to 6:00pm. Lectures were given in
the club house, with most shooting done on the adjacent pistol range.
We also made use of the indoor range and the tactical training house. |
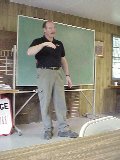 3.
John Holschen was the primary instructor for our session. John is
the Senior Combatives Instructor for InSights Training Center, and has
attended multiple course from InSights, Defense Training International,
and the Lethal Force Institute. He has over twenty years experience
in Martial Arts and has been teaching fifteen years. He is an Instructor
in Daito Ryu Aiki Budo, Shorin Ken Karate Do, and Shotokan Karate. He has
attended multiple Military Close Quarters Combat Courses and is certified
as an Instructor by the Armed Forces Martial Arts Association. John is
a qualified Special Forces Weapons Sergeant and Special Forces Medic, Nationally
Registered E.M.T. Paramedic, a member of the Washington State Law Enforcement
Firearms Instructors Association. He has served as the Senior Hand
to Hand Combat Instructor and Master Instructor for 1st Special Forces
Group. John was the first place finisher at the 1996 National Tactical
Invitational. He is currently an Instructor at the J.F.K. Special Warfare
Center at Ft. Bragg N.C. 3.
John Holschen was the primary instructor for our session. John is
the Senior Combatives Instructor for InSights Training Center, and has
attended multiple course from InSights, Defense Training International,
and the Lethal Force Institute. He has over twenty years experience
in Martial Arts and has been teaching fifteen years. He is an Instructor
in Daito Ryu Aiki Budo, Shorin Ken Karate Do, and Shotokan Karate. He has
attended multiple Military Close Quarters Combat Courses and is certified
as an Instructor by the Armed Forces Martial Arts Association. John is
a qualified Special Forces Weapons Sergeant and Special Forces Medic, Nationally
Registered E.M.T. Paramedic, a member of the Washington State Law Enforcement
Firearms Instructors Association. He has served as the Senior Hand
to Hand Combat Instructor and Master Instructor for 1st Special Forces
Group. John was the first place finisher at the 1996 National Tactical
Invitational. He is currently an Instructor at the J.F.K. Special Warfare
Center at Ft. Bragg N.C. |
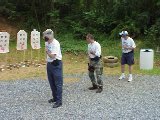
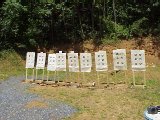 4.
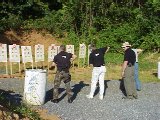
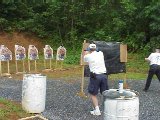
Range No. 2, where we did most of our drills. We made a lot of use
of the DEA Dot targets shown. These targets are great for warm ups,
as well as general practice. They were also effective in learning
how to manage recoil while engaging multiple targets. A typical drill
follows. Dot 1 = six shots slow fire. Dot 3 = six shots from
the ready position. Dot 5 = six shots from the holster. Dot
2 = three pairs slow fire. Dot 4 = three pairs from the ready position.
Dot 6 = three pairs from the holster. 4.
Range No. 2, where we did most of our drills. We made a lot of use
of the DEA Dot targets shown. These targets are great for warm ups,
as well as general practice. They were also effective in learning
how to manage recoil while engaging multiple targets. A typical drill
follows. Dot 1 = six shots slow fire. Dot 3 = six shots from
the ready position. Dot 5 = six shots from the holster. Dot
2 = three pairs slow fire. Dot 4 = three pairs from the ready position.
Dot 6 = three pairs from the holster. |
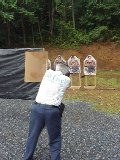
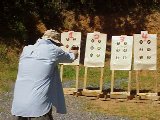 5.
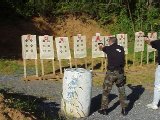
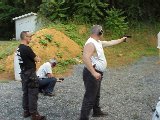
John Holschen demonstrates. Due to the angle, you can't see his target,
which was the fifth in the line. My shooting was good (target 4 was
mine) for the first two days. After that, my Glock 23 started failing
to extract. I got a lot of malfunction practice in and my groups
opened up as a consequence. Eventually I switched to my S&W and
my groups shrank again. 5.
John Holschen demonstrates. Due to the angle, you can't see his target,
which was the fifth in the line. My shooting was good (target 4 was
mine) for the first two days. After that, my Glock 23 started failing
to extract. I got a lot of malfunction practice in and my groups
opened up as a consequence. Eventually I switched to my S&W and
my groups shrank again. |
 6.
Here we are working on a smooth draw and presentation. The draw includes
the following steps: grip, draw, lock, slap, bang. On the grip, the
strong hand takes a firing grip and the off hand moves to the chest.
On the draw, the gun is drawn vertically from the holster as high as possible.
On the lock, the gun is rotated up and forward, bringing the muzzle on
line with the target. On slap, the gun is thrust forward and the
off hand takes its position in the grip. On bang, the gun is extended,
the sights are aligned, and the trigger is "prepped." If done correctly,
the shot should break at the instant the gun reaches full extension with
sights on target. 6.
Here we are working on a smooth draw and presentation. The draw includes
the following steps: grip, draw, lock, slap, bang. On the grip, the
strong hand takes a firing grip and the off hand moves to the chest.
On the draw, the gun is drawn vertically from the holster as high as possible.
On the lock, the gun is rotated up and forward, bringing the muzzle on
line with the target. On slap, the gun is thrust forward and the
off hand takes its position in the grip. On bang, the gun is extended,
the sights are aligned, and the trigger is "prepped." If done correctly,
the shot should break at the instant the gun reaches full extension with
sights on target. |
 7.
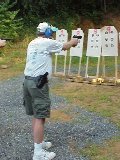
Practicing the shooting stance. Body is fairly square to the target,
feet shoulder-width apart, with strong side foot back in a boxer's stance.
Knees are straight, but not locked. Both arms are fully extended,
but with relaxed shoulders and head dropped forward and down between the
arms. Back is slouched lightly forward. Position might be called
a "modified isosceles." 7.
Practicing the shooting stance. Body is fairly square to the target,
feet shoulder-width apart, with strong side foot back in a boxer's stance.
Knees are straight, but not locked. Both arms are fully extended,
but with relaxed shoulders and head dropped forward and down between the
arms. Back is slouched lightly forward. Position might be called
a "modified isosceles." |
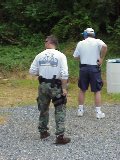
 8.
One of our classmates was, in his own terms, "a Washington bureaucrat."
Earlier in his career he was a field agent. He shot with an agency
issued Beretta in .40 S&W. Here we continue to work on draw and
presentation. 8.
One of our classmates was, in his own terms, "a Washington bureaucrat."
Earlier in his career he was a field agent. He shot with an agency
issued Beretta in .40 S&W. Here we continue to work on draw and
presentation. |
 9.
InSights has some great T-shirts, including "Happiness is being high on
the food chain," and "Pain is just weakness leaving the body." This
one, though, has got to be my favorite. I can't wait to wear mine
on my next camping trip with my Rainger ("rainger" because it always rains)
scout troop. 9.
InSights has some great T-shirts, including "Happiness is being high on
the food chain," and "Pain is just weakness leaving the body." This
one, though, has got to be my favorite. I can't wait to wear mine
on my next camping trip with my Rainger ("rainger" because it always rains)
scout troop. |
 10.
Contact distance drill. When the threat develops within arm's length,
the elbow strike both protects the head and impacts the assailant.
The gun is kept in close to prevent its being attacked or blocked by the
assailant, and the immediate aiming point is the pelvis. Fire, and
move to create distance. 10.
Contact distance drill. When the threat develops within arm's length,
the elbow strike both protects the head and impacts the assailant.
The gun is kept in close to prevent its being attacked or blocked by the
assailant, and the immediate aiming point is the pelvis. Fire, and
move to create distance. |
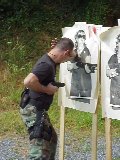
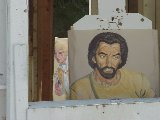
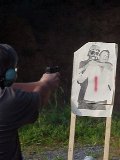 11.
Hostage! Not a nice drill, but an even worse situation in real life.
The target is obscured, giving you a very small aiming point. However,
statistics reveal that if you let the hostage be taken away, chances are
he or she will not be recovered safely. So it's now or never.
In this photo, the shooter is actually aiming at a target three to the
right of the one shown, but this makes a better picture. And that's
a number "1" on the target . . . not blood. 11.
Hostage! Not a nice drill, but an even worse situation in real life.
The target is obscured, giving you a very small aiming point. However,
statistics reveal that if you let the hostage be taken away, chances are
he or she will not be recovered safely. So it's now or never.
In this photo, the shooter is actually aiming at a target three to the
right of the one shown, but this makes a better picture. And that's
a number "1" on the target . . . not blood. |
 12.
A threat doesn't always appear directly in front of you. This is
a pivot and draw drill simulating a threat from the left. Throughout
the training, priority was placed on safety. So it was important
to practice moving and drawing to avoid covering one's self with the muzzle. 12.
A threat doesn't always appear directly in front of you. This is
a pivot and draw drill simulating a threat from the left. Throughout
the training, priority was placed on safety. So it was important
to practice moving and drawing to avoid covering one's self with the muzzle. |
 13.
Same drill, this time from the right. Note the location of the off
hand. This is where it goes every time one grips one's weapon.
Again, this is a safety precaution, designed to avoid covering one's self
with the muzzle. The off hand will assume its position in the firing
grip once the gun begins to move toward the threat. 13.
Same drill, this time from the right. Note the location of the off
hand. This is where it goes every time one grips one's weapon.
Again, this is a safety precaution, designed to avoid covering one's self
with the muzzle. The off hand will assume its position in the firing
grip once the gun begins to move toward the threat. |
 14.
Here we are learning to engage a target while "pie-ing" around cover.
With care, you can gain a lot of information about the threat before the
target is able to see you . . . which is as it should be. 14.
Here we are learning to engage a target while "pie-ing" around cover.
With care, you can gain a lot of information about the threat before the
target is able to see you . . . which is as it should be. |
 15.
The trick is to engage the known target before the bad guy sees you.
Note however, that it must be a "known" threat. Remember Rule 4:
"Be sure of your target and what is beyond it." Being sure includes
certainty that the target is indeed a threat. 15.
The trick is to engage the known target before the bad guy sees you.
Note however, that it must be a "known" threat. Remember Rule 4:
"Be sure of your target and what is beyond it." Being sure includes
certainty that the target is indeed a threat. |
 16.
Low light techniques. This picture shows (?) the tactical deployment
of a flashlight. You can make out the target left of center of the
picture; it is illuminated by a Sure-Fire flashlight held against the shooter's
chest. You can see the shooter's forearm as he sights on the target
(the light at furthest right is light coming in under the door of the indoor
range). It was dark! We quickly saw the value of night sights.
The Trijicons on my Glock 23 helped me keep a nice tight group despite
the darkness. 16.
Low light techniques. This picture shows (?) the tactical deployment
of a flashlight. You can make out the target left of center of the
picture; it is illuminated by a Sure-Fire flashlight held against the shooter's
chest. You can see the shooter's forearm as he sights on the target
(the light at furthest right is light coming in under the door of the indoor
range). It was dark! We quickly saw the value of night sights.
The Trijicons on my Glock 23 helped me keep a nice tight group despite
the darkness. |
 17.
What happens if you are injured in a fight? Here we work on weak
hand shooting. Clear sight picture and smooth trigger manipulation
continue to result in good hits. 17.
What happens if you are injured in a fight? Here we work on weak
hand shooting. Clear sight picture and smooth trigger manipulation
continue to result in good hits. |
 18.
This is a weak hand immediate action malfunction drill. The normal
immediate action drill is "tap, rack, bank." Here, we're practicing
racking the slide by gripping it behind the knee. This is necessary
if you have plastic sights that might rip off, or Novak style ramped sights
that have no surface to give a good purchase, if racking by hooking the
sights on your belt or magazine carrier. 18.
This is a weak hand immediate action malfunction drill. The normal
immediate action drill is "tap, rack, bank." Here, we're practicing
racking the slide by gripping it behind the knee. This is necessary
if you have plastic sights that might rip off, or Novak style ramped sights
that have no surface to give a good purchase, if racking by hooking the
sights on your belt or magazine carrier. |
 19.
The tactical training house (or shoot house) provided an opportunity to
put all the skills together in a tactical situation. The scenario:
You are waiting in your accountant's office when there is an explosion
and gunfire from a government office that shares the building. Objective:
get out safely. 19.
The tactical training house (or shoot house) provided an opportunity to
put all the skills together in a tactical situation. The scenario:
You are waiting in your accountant's office when there is an explosion
and gunfire from a government office that shares the building. Objective:
get out safely. |
 20.
The range officers helping with the shoot house called doorways and hallways
"bullet magnets." They should be avoided for obvious reasons.
When talking to an unknown individual in the next room, retreat to the
last cover position. This works to your advantage should the unknown
bring the attack to you. 20.
The range officers helping with the shoot house called doorways and hallways
"bullet magnets." They should be avoided for obvious reasons.
When talking to an unknown individual in the next room, retreat to the
last cover position. This works to your advantage should the unknown
bring the attack to you. |
 21.
Case in point. Move quickly down this long hallway, but retreat to
the cover at this end before shouting commands to the occupants of the
next room. The range officer in this photo has his hand lightly on
the shooter to ensure safe gun handling. He is not directing the
shooter in any way. 21.
Case in point. Move quickly down this long hallway, but retreat to
the cover at this end before shouting commands to the occupants of the
next room. The range officer in this photo has his hand lightly on
the shooter to ensure safe gun handling. He is not directing the
shooter in any way. |
 22.
Here the shooter is working a door into an adjacent hallway. On opening
the door, you are faced with a hallway that extends both directions.
You have to figure out how to clear it without exposing yourself to gunfire.
The hall also contained a closet and an open window to deal with. 22.
Here the shooter is working a door into an adjacent hallway. On opening
the door, you are faced with a hallway that extends both directions.
You have to figure out how to clear it without exposing yourself to gunfire.
The hall also contained a closet and an open window to deal with. |
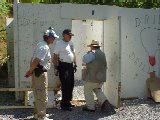 23.
After the exercise, each shooter was debriefed. Here Skip demonstrates
how to work the door both effectively and quickly. As doors are bullet
magnets, you want to get through them as safely - and as quickly - as possible.
This does not mean one simply leaps into the room, however. 23.
After the exercise, each shooter was debriefed. Here Skip demonstrates
how to work the door both effectively and quickly. As doors are bullet
magnets, you want to get through them as safely - and as quickly - as possible.
This does not mean one simply leaps into the room, however. |
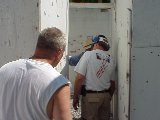 24.
I believe the question here is, "Why did you shoot this guy?" There
was a no-shoot target right around this corner, but behind him was an armed
threat. You had to "pie" past the unarmed individual to pick up the
real threat. Several of us "first timers" (i.e., those who had never
experienced a shoot house) failed this part of the drill first time through.
It was a powerful learning experience. 24.
I believe the question here is, "Why did you shoot this guy?" There
was a no-shoot target right around this corner, but behind him was an armed
threat. You had to "pie" past the unarmed individual to pick up the
real threat. Several of us "first timers" (i.e., those who had never
experienced a shoot house) failed this part of the drill first time through.
It was a powerful learning experience. |
 25.
On my run through the shoot house, I was slow to pick up the guy hiding
behind the barrel. I eventually spotted him and was able to engage.
Lesson: treat any cover as a corner and pie accordingly. 25.
On my run through the shoot house, I was slow to pick up the guy hiding
behind the barrel. I eventually spotted him and was able to engage.
Lesson: treat any cover as a corner and pie accordingly. |
 26.
I never did see the armed target in this photo. The guy was outside
the building, visible through a window, and obscured by a no-shoot target.
Lesson: when you scan, don't stop at the boundaries of the structure; look
through and beyond. 26.
I never did see the armed target in this photo. The guy was outside
the building, visible through a window, and obscured by a no-shoot target.
Lesson: when you scan, don't stop at the boundaries of the structure; look
through and beyond. |
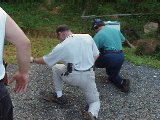
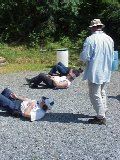 27.
The best position to fight from when knocked to the ground is on your back,
primarily because it is easier to see what is happening around you.
Here we are learning to draw while on the ground. First time through
was without the gun, to practice the movements necessary to avoid shooting
ourselves in the knee. 27.
The best position to fight from when knocked to the ground is on your back,
primarily because it is easier to see what is happening around you.
Here we are learning to draw while on the ground. First time through
was without the gun, to practice the movements necessary to avoid shooting
ourselves in the knee. |
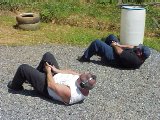 28.
Now the real thing. This is actually a very stable firing position.
We also practiced several prone positions which also proved very stable.
These are good for making use of very low cover. 28.
Now the real thing. This is actually a very stable firing position.
We also practiced several prone positions which also proved very stable.
These are good for making use of very low cover. |
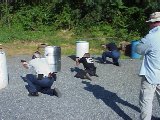 29.
Eventually we put it all together; moving to cover and pieing around it
to address the threat. 29.
Eventually we put it all together; moving to cover and pieing around it
to address the threat. |
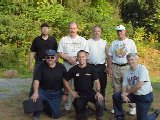 30.
There were seven students for the first two days. Three left, and
two joined for the last three days. The small class size provided
lots of one-on-one coaching, and very good class interaction. Those
there at the end included a veterinarian, a police officer, a medical doctor,
a university professor, a Pennsylvania state employee, and a Washington
bureaucrat. A pretty intelligent and thoughtful group. 30.
There were seven students for the first two days. Three left, and
two joined for the last three days. The small class size provided
lots of one-on-one coaching, and very good class interaction. Those
there at the end included a veterinarian, a police officer, a medical doctor,
a university professor, a Pennsylvania state employee, and a Washington
bureaucrat. A pretty intelligent and thoughtful group. |
 1.
The course was held at the facilities of the West Shore Sportsmen's Association
in Harrisburg, PA. The WSSA has nine different outdoor pistol and/or
rifle ranges, including steel plate, cowboy action, and tactical training
house ranges. They also have outdoor trap and archery ranges, plus
an indoor range. One of the better facilities I've visited.
1.
The course was held at the facilities of the West Shore Sportsmen's Association
in Harrisburg, PA. The WSSA has nine different outdoor pistol and/or
rifle ranges, including steel plate, cowboy action, and tactical training
house ranges. They also have outdoor trap and archery ranges, plus
an indoor range. One of the better facilities I've visited.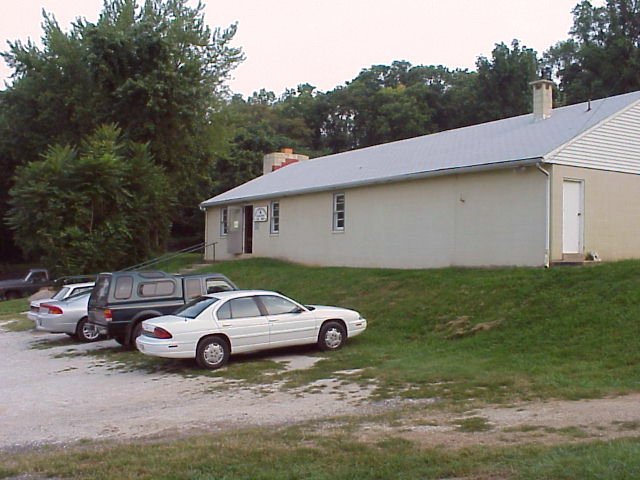 2.
The class met daily from 8:00am to 6:00pm. Lectures were given in
the club house, with most shooting done on the adjacent pistol range.
We also made use of the indoor range and the tactical training house.
2.
The class met daily from 8:00am to 6:00pm. Lectures were given in
the club house, with most shooting done on the adjacent pistol range.
We also made use of the indoor range and the tactical training house.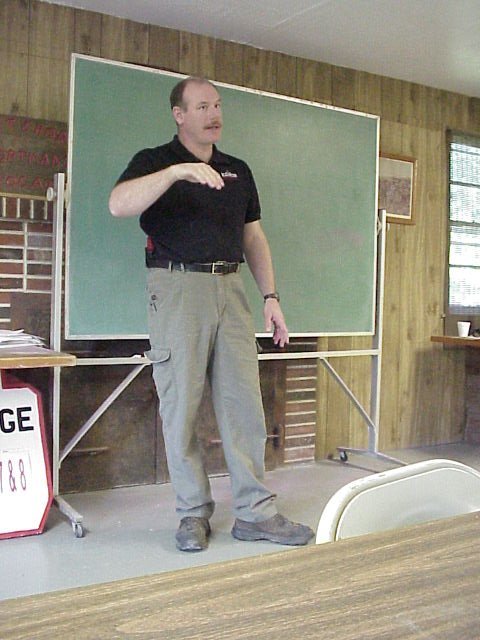 3.
John Holschen was the primary instructor for our session. John is
the Senior Combatives Instructor for InSights Training Center, and has
attended multiple course from InSights, Defense Training International,
and the Lethal Force Institute. He has over twenty years experience
in Martial Arts and has been teaching fifteen years. He is an Instructor
in Daito Ryu Aiki Budo, Shorin Ken Karate Do, and Shotokan Karate. He has
attended multiple Military Close Quarters Combat Courses and is certified
as an Instructor by the Armed Forces Martial Arts Association. John is
a qualified Special Forces Weapons Sergeant and Special Forces Medic, Nationally
Registered E.M.T. Paramedic, a member of the Washington State Law Enforcement
Firearms Instructors Association. He has served as the Senior Hand
to Hand Combat Instructor and Master Instructor for 1st Special Forces
Group. John was the first place finisher at the 1996 National Tactical
Invitational. He is currently an Instructor at the J.F.K. Special Warfare
Center at Ft. Bragg N.C.
3.
John Holschen was the primary instructor for our session. John is
the Senior Combatives Instructor for InSights Training Center, and has
attended multiple course from InSights, Defense Training International,
and the Lethal Force Institute. He has over twenty years experience
in Martial Arts and has been teaching fifteen years. He is an Instructor
in Daito Ryu Aiki Budo, Shorin Ken Karate Do, and Shotokan Karate. He has
attended multiple Military Close Quarters Combat Courses and is certified
as an Instructor by the Armed Forces Martial Arts Association. John is
a qualified Special Forces Weapons Sergeant and Special Forces Medic, Nationally
Registered E.M.T. Paramedic, a member of the Washington State Law Enforcement
Firearms Instructors Association. He has served as the Senior Hand
to Hand Combat Instructor and Master Instructor for 1st Special Forces
Group. John was the first place finisher at the 1996 National Tactical
Invitational. He is currently an Instructor at the J.F.K. Special Warfare
Center at Ft. Bragg N.C.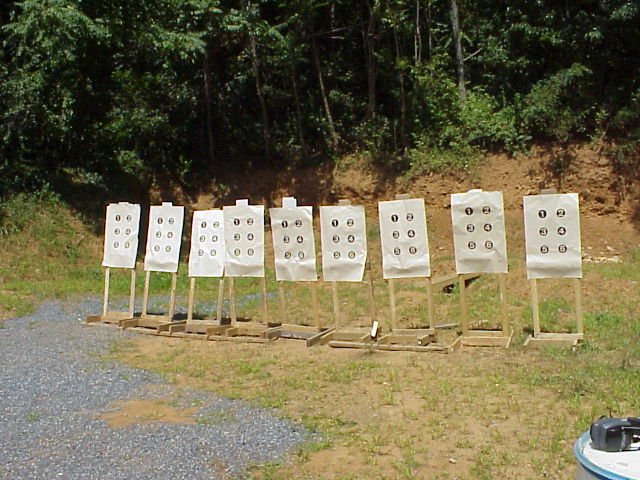 4.
Range No. 2, where we did most of our drills. We made a lot of use
of the DEA Dot targets shown. These targets are great for warm ups,
as well as general practice. They were also effective in learning
how to manage recoil while engaging multiple targets. A typical drill
follows. Dot 1 = six shots slow fire. Dot 3 = six shots from
the ready position. Dot 5 = six shots from the holster. Dot
2 = three pairs slow fire. Dot 4 = three pairs from the ready position.
Dot 6 = three pairs from the holster.
4.
Range No. 2, where we did most of our drills. We made a lot of use
of the DEA Dot targets shown. These targets are great for warm ups,
as well as general practice. They were also effective in learning
how to manage recoil while engaging multiple targets. A typical drill
follows. Dot 1 = six shots slow fire. Dot 3 = six shots from
the ready position. Dot 5 = six shots from the holster. Dot
2 = three pairs slow fire. Dot 4 = three pairs from the ready position.
Dot 6 = three pairs from the holster.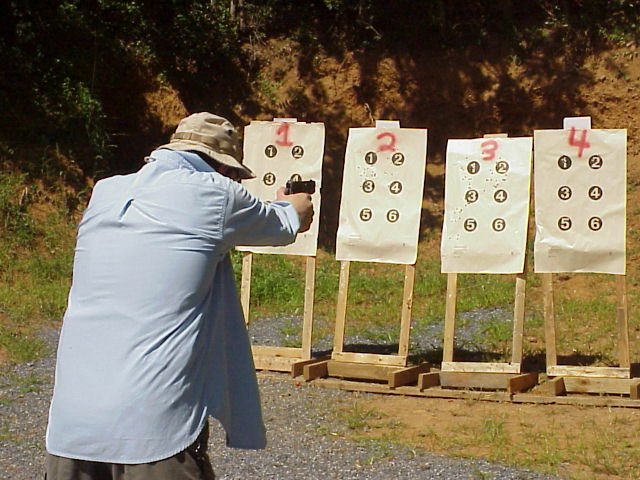 5.
John Holschen demonstrates. Due to the angle, you can't see his target,
which was the fifth in the line. My shooting was good (target 4 was
mine) for the first two days. After that, my Glock 23 started failing
to extract. I got a lot of malfunction practice in and my groups
opened up as a consequence. Eventually I switched to my S&W and
my groups shrank again.
5.
John Holschen demonstrates. Due to the angle, you can't see his target,
which was the fifth in the line. My shooting was good (target 4 was
mine) for the first two days. After that, my Glock 23 started failing
to extract. I got a lot of malfunction practice in and my groups
opened up as a consequence. Eventually I switched to my S&W and
my groups shrank again.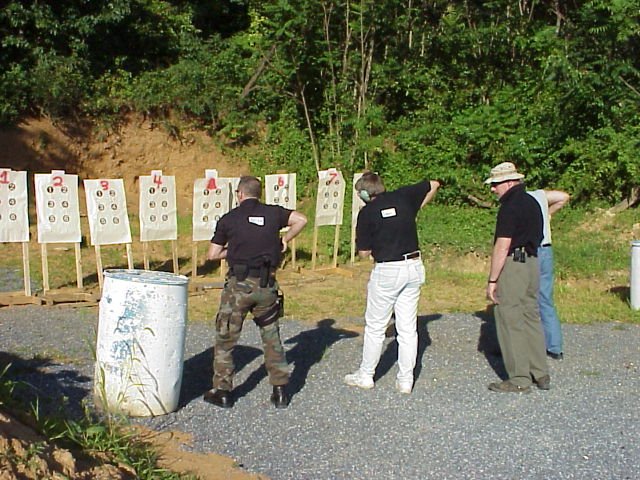 6.
Here we are working on a smooth draw and presentation. The draw includes
the following steps: grip, draw, lock, slap, bang. On the grip, the
strong hand takes a firing grip and the off hand moves to the chest.
On the draw, the gun is drawn vertically from the holster as high as possible.
On the lock, the gun is rotated up and forward, bringing the muzzle on
line with the target. On slap, the gun is thrust forward and the
off hand takes its position in the grip. On bang, the gun is extended,
the sights are aligned, and the trigger is "prepped." If done correctly,
the shot should break at the instant the gun reaches full extension with
sights on target.
6.
Here we are working on a smooth draw and presentation. The draw includes
the following steps: grip, draw, lock, slap, bang. On the grip, the
strong hand takes a firing grip and the off hand moves to the chest.
On the draw, the gun is drawn vertically from the holster as high as possible.
On the lock, the gun is rotated up and forward, bringing the muzzle on
line with the target. On slap, the gun is thrust forward and the
off hand takes its position in the grip. On bang, the gun is extended,
the sights are aligned, and the trigger is "prepped." If done correctly,
the shot should break at the instant the gun reaches full extension with
sights on target.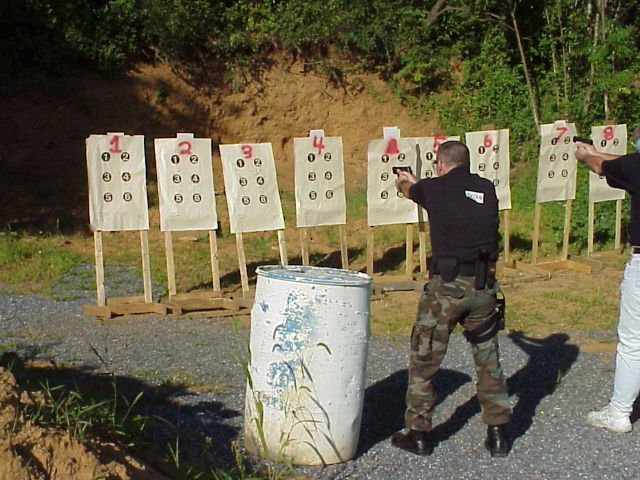 7.
Practicing the shooting stance. Body is fairly square to the target,
feet shoulder-width apart, with strong side foot back in a boxer's stance.
Knees are straight, but not locked. Both arms are fully extended,
but with relaxed shoulders and head dropped forward and down between the
arms. Back is slouched lightly forward. Position might be called
a "modified isosceles."
7.
Practicing the shooting stance. Body is fairly square to the target,
feet shoulder-width apart, with strong side foot back in a boxer's stance.
Knees are straight, but not locked. Both arms are fully extended,
but with relaxed shoulders and head dropped forward and down between the
arms. Back is slouched lightly forward. Position might be called
a "modified isosceles."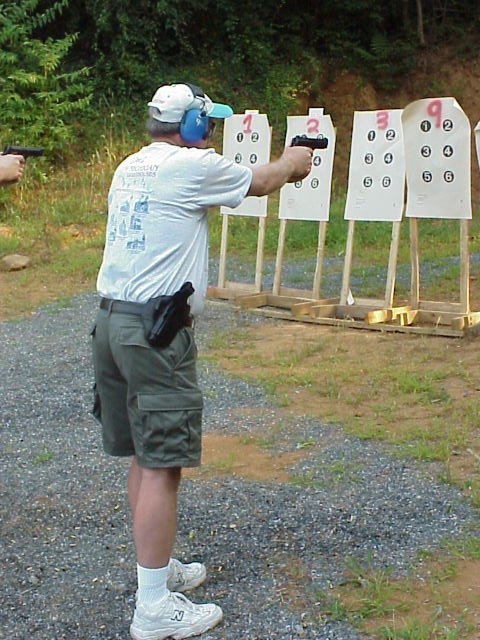 8.
One of our classmates was, in his own terms, "a Washington bureaucrat."
Earlier in his career he was a field agent. He shot with an agency
issued Beretta in .40 S&W. Here we continue to work on draw and
presentation.
8.
One of our classmates was, in his own terms, "a Washington bureaucrat."
Earlier in his career he was a field agent. He shot with an agency
issued Beretta in .40 S&W. Here we continue to work on draw and
presentation.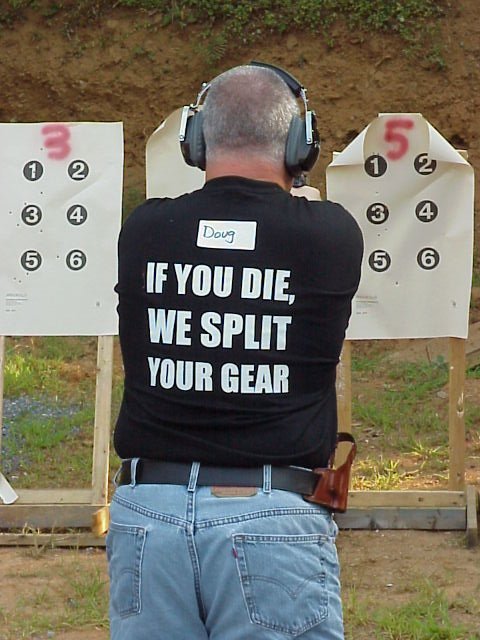 9.
InSights has some great T-shirts, including "Happiness is being high on
the food chain," and "Pain is just weakness leaving the body." This
one, though, has got to be my favorite. I can't wait to wear mine
on my next camping trip with my Rainger ("rainger" because it always rains)
scout troop.
9.
InSights has some great T-shirts, including "Happiness is being high on
the food chain," and "Pain is just weakness leaving the body." This
one, though, has got to be my favorite. I can't wait to wear mine
on my next camping trip with my Rainger ("rainger" because it always rains)
scout troop.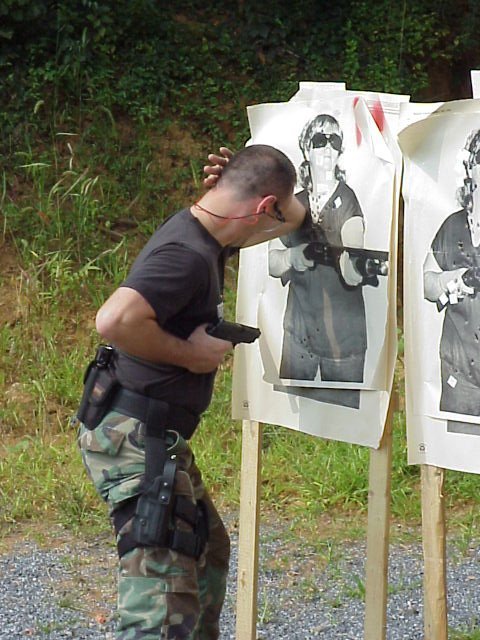 10.
Contact distance drill. When the threat develops within arm's length,
the elbow strike both protects the head and impacts the assailant.
The gun is kept in close to prevent its being attacked or blocked by the
assailant, and the immediate aiming point is the pelvis. Fire, and
move to create distance.
10.
Contact distance drill. When the threat develops within arm's length,
the elbow strike both protects the head and impacts the assailant.
The gun is kept in close to prevent its being attacked or blocked by the
assailant, and the immediate aiming point is the pelvis. Fire, and
move to create distance.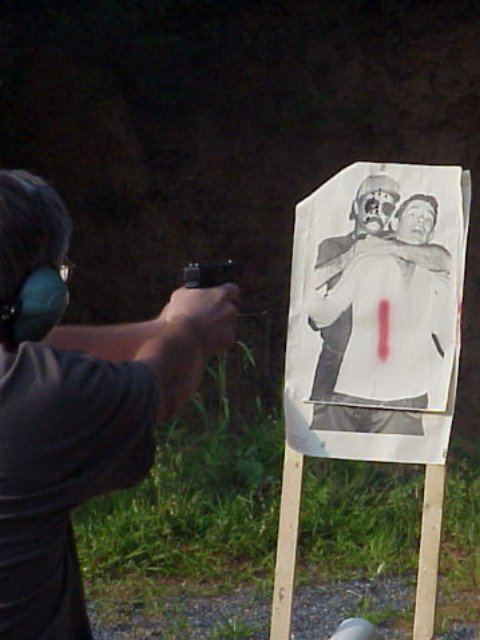 11.
Hostage! Not a nice drill, but an even worse situation in real life.
The target is obscured, giving you a very small aiming point. However,
statistics reveal that if you let the hostage be taken away, chances are
he or she will not be recovered safely. So it's now or never.
In this photo, the shooter is actually aiming at a target three to the
right of the one shown, but this makes a better picture. And that's
a number "1" on the target . . . not blood.
11.
Hostage! Not a nice drill, but an even worse situation in real life.
The target is obscured, giving you a very small aiming point. However,
statistics reveal that if you let the hostage be taken away, chances are
he or she will not be recovered safely. So it's now or never.
In this photo, the shooter is actually aiming at a target three to the
right of the one shown, but this makes a better picture. And that's
a number "1" on the target . . . not blood. 12.
A threat doesn't always appear directly in front of you. This is
a pivot and draw drill simulating a threat from the left. Throughout
the training, priority was placed on safety. So it was important
to practice moving and drawing to avoid covering one's self with the muzzle.
12.
A threat doesn't always appear directly in front of you. This is
a pivot and draw drill simulating a threat from the left. Throughout
the training, priority was placed on safety. So it was important
to practice moving and drawing to avoid covering one's self with the muzzle.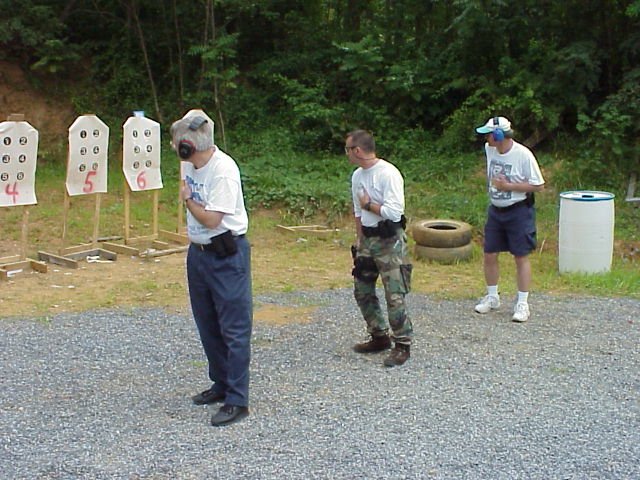 13.
Same drill, this time from the right. Note the location of the off
hand. This is where it goes every time one grips one's weapon.
Again, this is a safety precaution, designed to avoid covering one's self
with the muzzle. The off hand will assume its position in the firing
grip once the gun begins to move toward the threat.
13.
Same drill, this time from the right. Note the location of the off
hand. This is where it goes every time one grips one's weapon.
Again, this is a safety precaution, designed to avoid covering one's self
with the muzzle. The off hand will assume its position in the firing
grip once the gun begins to move toward the threat.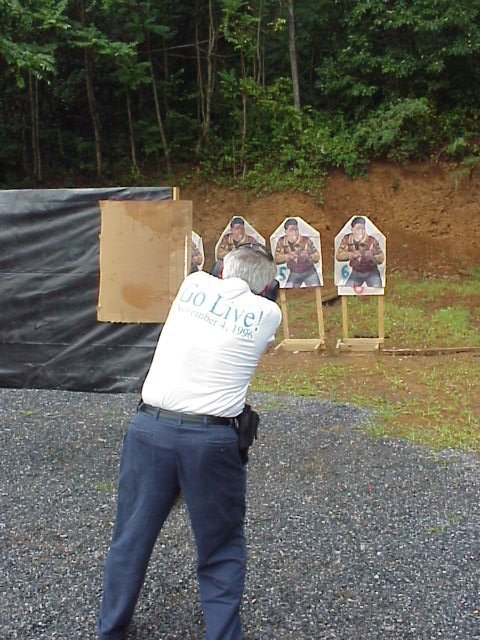 14.
Here we are learning to engage a target while "pie-ing" around cover.
With care, you can gain a lot of information about the threat before the
target is able to see you . . . which is as it should be.
14.
Here we are learning to engage a target while "pie-ing" around cover.
With care, you can gain a lot of information about the threat before the
target is able to see you . . . which is as it should be.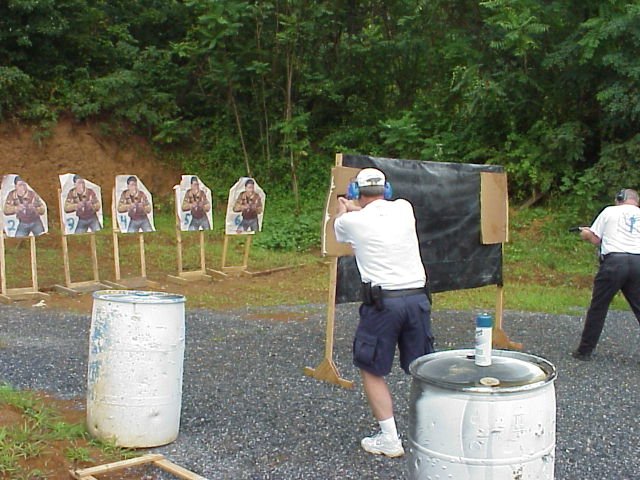 15.
The trick is to engage the known target before the bad guy sees you.
Note however, that it must be a "known" threat. Remember Rule 4:
"Be sure of your target and what is beyond it." Being sure includes
certainty that the target is indeed a threat.
15.
The trick is to engage the known target before the bad guy sees you.
Note however, that it must be a "known" threat. Remember Rule 4:
"Be sure of your target and what is beyond it." Being sure includes
certainty that the target is indeed a threat. 16.
Low light techniques. This picture shows (?) the tactical deployment
of a flashlight. You can make out the target left of center of the
picture; it is illuminated by a Sure-Fire flashlight held against the shooter's
chest. You can see the shooter's forearm as he sights on the target
(the light at furthest right is light coming in under the door of the indoor
range). It was dark! We quickly saw the value of night sights.
The Trijicons on my Glock 23 helped me keep a nice tight group despite
the darkness.
16.
Low light techniques. This picture shows (?) the tactical deployment
of a flashlight. You can make out the target left of center of the
picture; it is illuminated by a Sure-Fire flashlight held against the shooter's
chest. You can see the shooter's forearm as he sights on the target
(the light at furthest right is light coming in under the door of the indoor
range). It was dark! We quickly saw the value of night sights.
The Trijicons on my Glock 23 helped me keep a nice tight group despite
the darkness.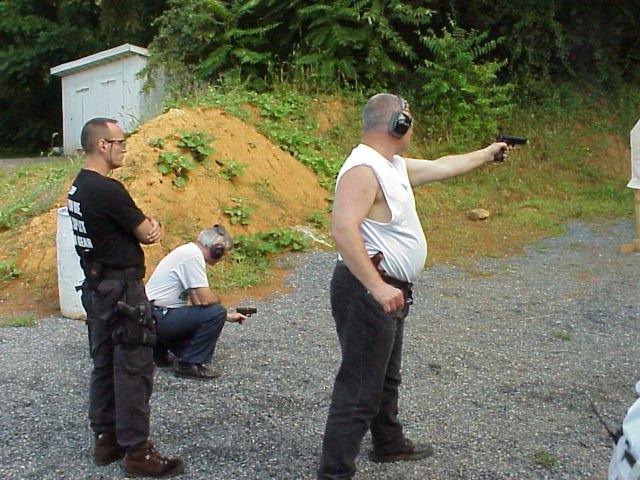 17.
What happens if you are injured in a fight? Here we work on weak
hand shooting. Clear sight picture and smooth trigger manipulation
continue to result in good hits.
17.
What happens if you are injured in a fight? Here we work on weak
hand shooting. Clear sight picture and smooth trigger manipulation
continue to result in good hits.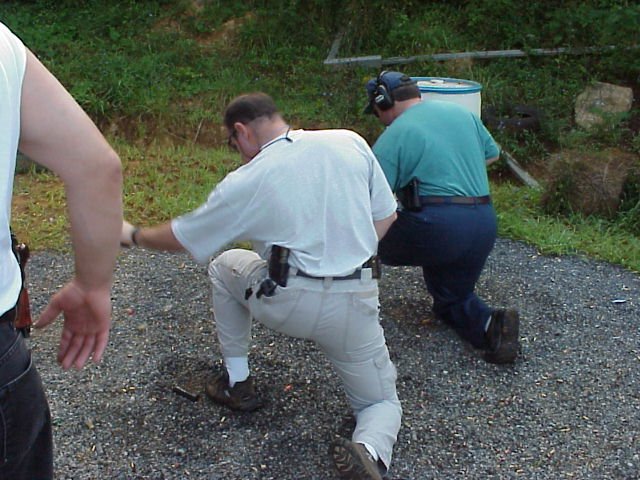 18.
This is a weak hand immediate action malfunction drill. The normal
immediate action drill is "tap, rack, bank." Here, we're practicing
racking the slide by gripping it behind the knee. This is necessary
if you have plastic sights that might rip off, or Novak style ramped sights
that have no surface to give a good purchase, if racking by hooking the
sights on your belt or magazine carrier.
18.
This is a weak hand immediate action malfunction drill. The normal
immediate action drill is "tap, rack, bank." Here, we're practicing
racking the slide by gripping it behind the knee. This is necessary
if you have plastic sights that might rip off, or Novak style ramped sights
that have no surface to give a good purchase, if racking by hooking the
sights on your belt or magazine carrier. 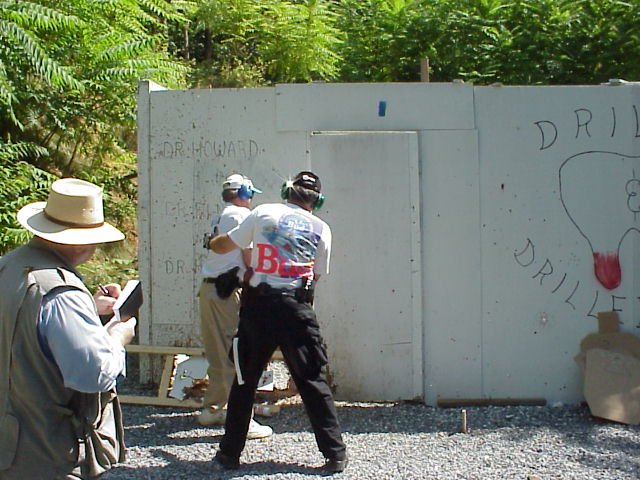 19.
The tactical training house (or shoot house) provided an opportunity to
put all the skills together in a tactical situation. The scenario:
You are waiting in your accountant's office when there is an explosion
and gunfire from a government office that shares the building. Objective:
get out safely.
19.
The tactical training house (or shoot house) provided an opportunity to
put all the skills together in a tactical situation. The scenario:
You are waiting in your accountant's office when there is an explosion
and gunfire from a government office that shares the building. Objective:
get out safely.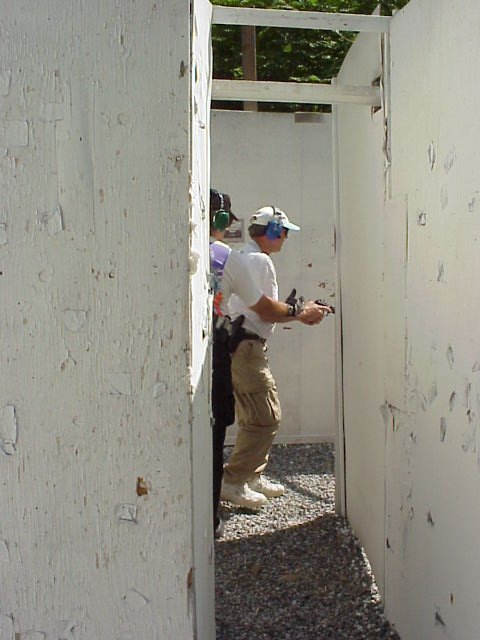 20.
The range officers helping with the shoot house called doorways and hallways
"bullet magnets." They should be avoided for obvious reasons.
When talking to an unknown individual in the next room, retreat to the
last cover position. This works to your advantage should the unknown
bring the attack to you.
20.
The range officers helping with the shoot house called doorways and hallways
"bullet magnets." They should be avoided for obvious reasons.
When talking to an unknown individual in the next room, retreat to the
last cover position. This works to your advantage should the unknown
bring the attack to you.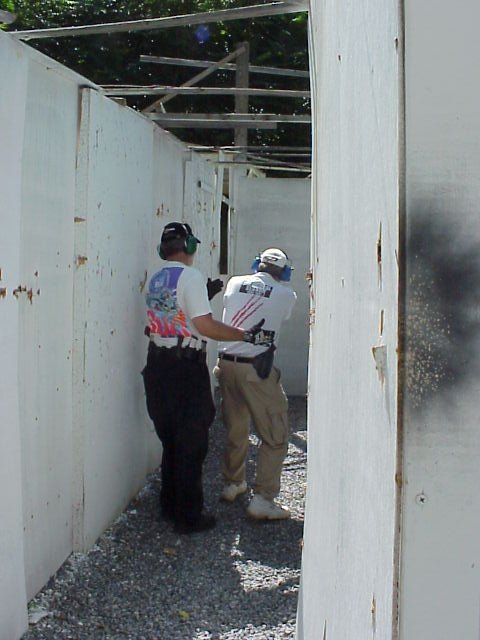 21.
Case in point. Move quickly down this long hallway, but retreat to
the cover at this end before shouting commands to the occupants of the
next room. The range officer in this photo has his hand lightly on
the shooter to ensure safe gun handling. He is not directing the
shooter in any way.
21.
Case in point. Move quickly down this long hallway, but retreat to
the cover at this end before shouting commands to the occupants of the
next room. The range officer in this photo has his hand lightly on
the shooter to ensure safe gun handling. He is not directing the
shooter in any way. 22.
Here the shooter is working a door into an adjacent hallway. On opening
the door, you are faced with a hallway that extends both directions.
You have to figure out how to clear it without exposing yourself to gunfire.
The hall also contained a closet and an open window to deal with.
22.
Here the shooter is working a door into an adjacent hallway. On opening
the door, you are faced with a hallway that extends both directions.
You have to figure out how to clear it without exposing yourself to gunfire.
The hall also contained a closet and an open window to deal with.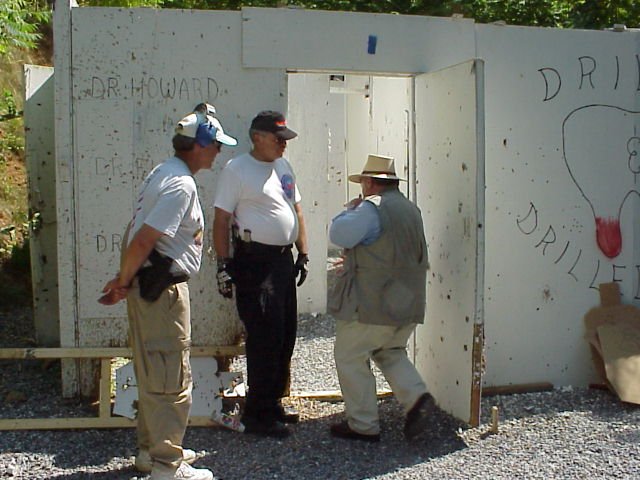 23.
After the exercise, each shooter was debriefed. Here Skip demonstrates
how to work the door both effectively and quickly. As doors are bullet
magnets, you want to get through them as safely - and as quickly - as possible.
This does not mean one simply leaps into the room, however.
23.
After the exercise, each shooter was debriefed. Here Skip demonstrates
how to work the door both effectively and quickly. As doors are bullet
magnets, you want to get through them as safely - and as quickly - as possible.
This does not mean one simply leaps into the room, however.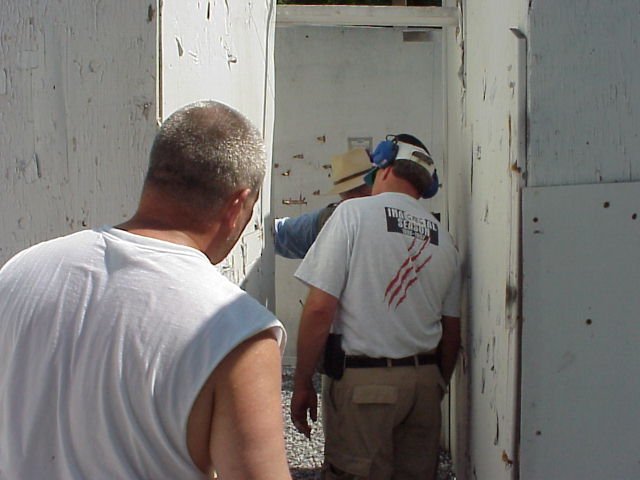 24.
I believe the question here is, "Why did you shoot this guy?" There
was a no-shoot target right around this corner, but behind him was an armed
threat. You had to "pie" past the unarmed individual to pick up the
real threat. Several of us "first timers" (i.e., those who had never
experienced a shoot house) failed this part of the drill first time through.
It was a powerful learning experience.
24.
I believe the question here is, "Why did you shoot this guy?" There
was a no-shoot target right around this corner, but behind him was an armed
threat. You had to "pie" past the unarmed individual to pick up the
real threat. Several of us "first timers" (i.e., those who had never
experienced a shoot house) failed this part of the drill first time through.
It was a powerful learning experience.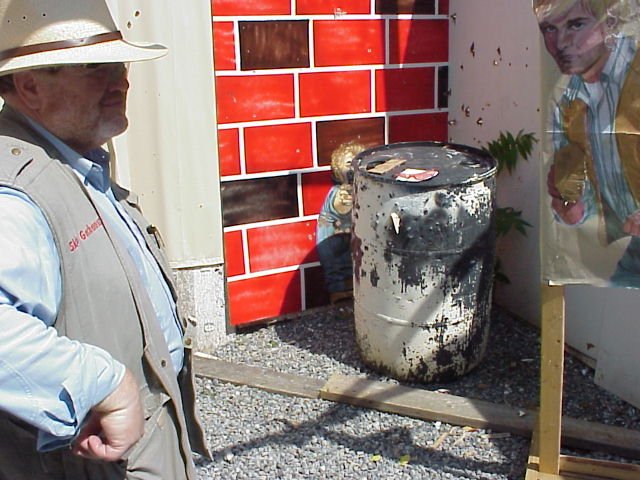 25.
On my run through the shoot house, I was slow to pick up the guy hiding
behind the barrel. I eventually spotted him and was able to engage.
Lesson: treat any cover as a corner and pie accordingly.
25.
On my run through the shoot house, I was slow to pick up the guy hiding
behind the barrel. I eventually spotted him and was able to engage.
Lesson: treat any cover as a corner and pie accordingly.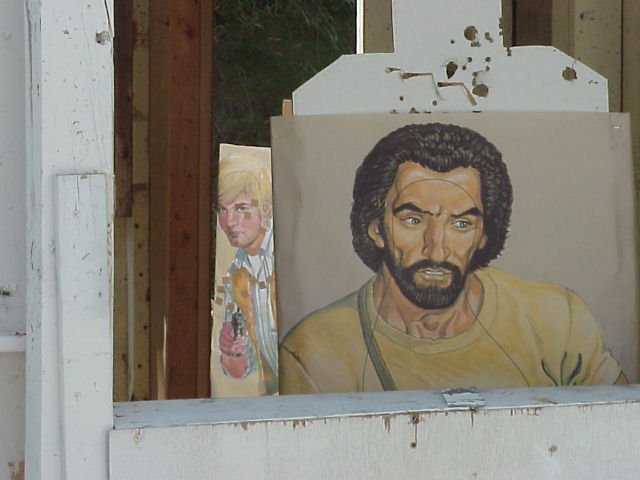 26.
I never did see the armed target in this photo. The guy was outside
the building, visible through a window, and obscured by a no-shoot target.
Lesson: when you scan, don't stop at the boundaries of the structure; look
through and beyond.
26.
I never did see the armed target in this photo. The guy was outside
the building, visible through a window, and obscured by a no-shoot target.
Lesson: when you scan, don't stop at the boundaries of the structure; look
through and beyond.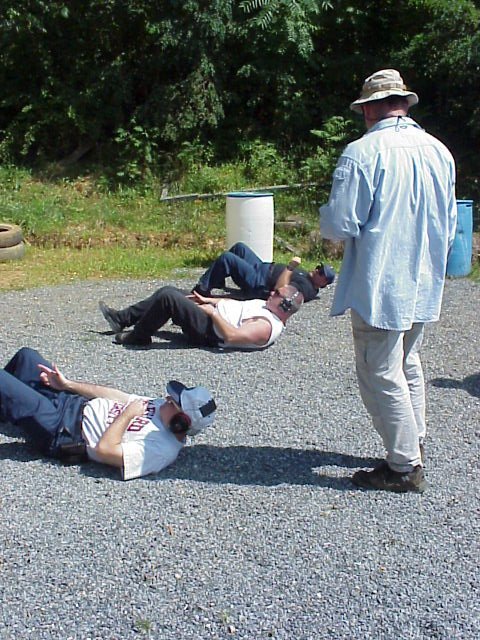 27.
The best position to fight from when knocked to the ground is on your back,
primarily because it is easier to see what is happening around you.
Here we are learning to draw while on the ground. First time through
was without the gun, to practice the movements necessary to avoid shooting
ourselves in the knee.
27.
The best position to fight from when knocked to the ground is on your back,
primarily because it is easier to see what is happening around you.
Here we are learning to draw while on the ground. First time through
was without the gun, to practice the movements necessary to avoid shooting
ourselves in the knee.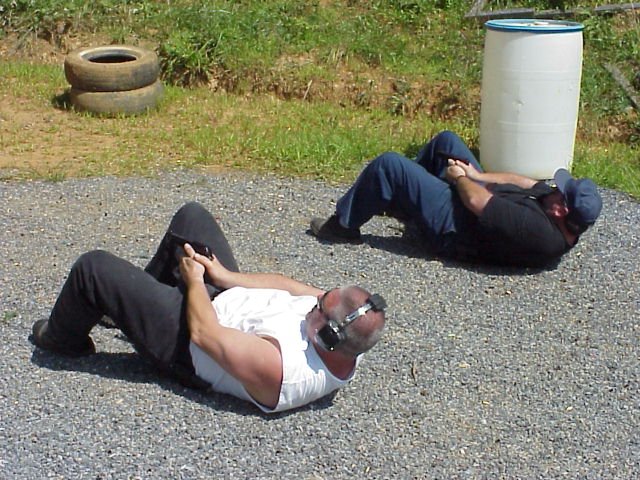 28.
Now the real thing. This is actually a very stable firing position.
We also practiced several prone positions which also proved very stable.
These are good for making use of very low cover.
28.
Now the real thing. This is actually a very stable firing position.
We also practiced several prone positions which also proved very stable.
These are good for making use of very low cover.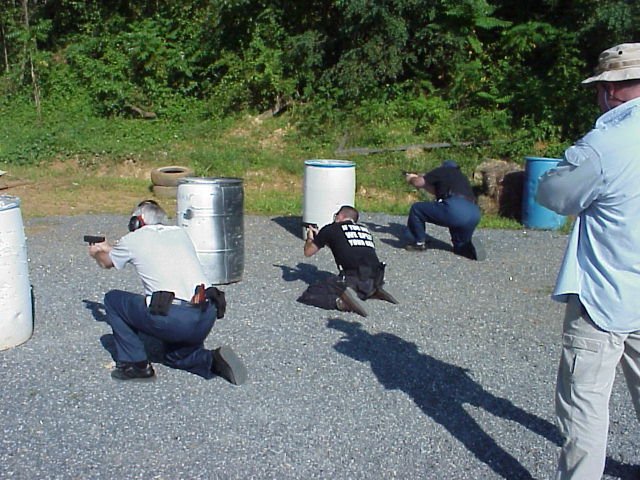 29.
Eventually we put it all together; moving to cover and pieing around it
to address the threat.
29.
Eventually we put it all together; moving to cover and pieing around it
to address the threat.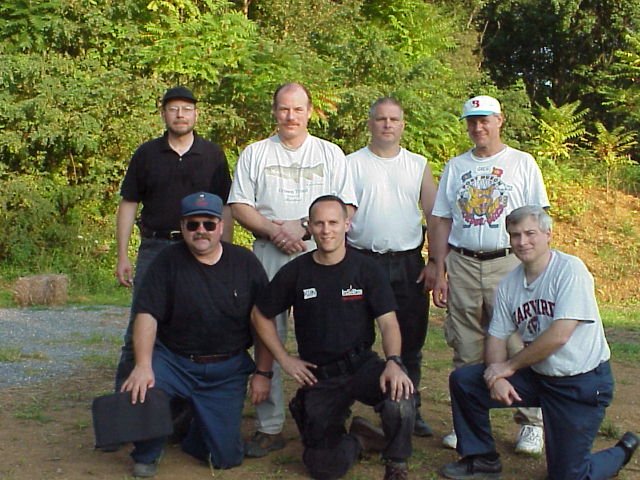 30.
There were seven students for the first two days. Three left, and
two joined for the last three days. The small class size provided
lots of one-on-one coaching, and very good class interaction. Those
there at the end included a veterinarian, a police officer, a medical doctor,
a university professor, a Pennsylvania state employee, and a Washington
bureaucrat. A pretty intelligent and thoughtful group.
30.
There were seven students for the first two days. Three left, and
two joined for the last three days. The small class size provided
lots of one-on-one coaching, and very good class interaction. Those
there at the end included a veterinarian, a police officer, a medical doctor,
a university professor, a Pennsylvania state employee, and a Washington
bureaucrat. A pretty intelligent and thoughtful group.